Tuesday, November 8, 2011

Digital Art Show


I was really surprised when my dorm was opening digital art gallery that involved "Digital Painting."
The RHE (Residence Hall Exhibition) coordinator sent me a message that they would like me to participate too because the coordinator once saw me doing digital painting at the studio.

The poster of Digital Art Show

My digital painting

Here's the better quality version of my digital painting.
My main focus was using digital tools to reenact the traditional calligraphy and water color painting.

Agyo (2011)

and for bonus...
Frog Beetle Practice (2011)


Saturday, October 15, 2011

More digital painting practice I did during these past weeks

 Cassowary

 Gerenuk

 Apple Practice

Onion Practice

Monday, September 5, 2011

Landscape Narrative Projects

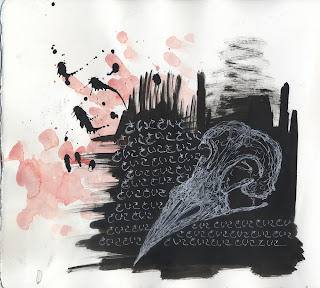
After finishing Landscape Narrative Sketchbook, the instructor told me to see through my sketches and find what I got interested the most. I enjoyed using indian ink as a background and add squiggly line with white gel pen. I decided to proceed with this technique by doing a painted canvas but with tempura wash technique, and this here is my result:
untitled, tempura, acrylic, and gouache, 2010

The tempura wash technique is using gouache on canvas then layering it over with tempura. After the tempura got completely dried, wash tempura layer very lightly.

Since I'm used to doing anything on top of canvas, I decided to leave my comfort zone and do wire sculpture installation. 


All of them are down with stainless steel wire, coated with gouache and acrylics. After finishing all 7 sculptures, I fused with all together and this is my final product:


Untitled, stainless steel and gouache, 2010
(It's about 5 feet tall and around 3.5 feet wide.)
Sadly I didn't took angled picture of this sculpture because it is very dimensional and not flat.

Here some extra stuff, mostly my work in progress pictures I scavanged.

There's my foot~


Wednesday, August 31, 2011

Landscape Narrative Sketchbook

This Spring, I took a class called Landscape Narrative. Don't let the title fool ya, this class has NOTHING to do with landscapes *This is why you read the class description or you pay the consequence >=D*. This class involves more about going deeper into the art theme you are interested with and developing that art theme (yeah I still don't know why the teacher calls this "Landscape Narrative"). I enjoyed (most of time) this class because this class makes you get out of comfort zone. In class you start making our own sketchbook and add water color background. You can utilize the background or not. I drew stuff what I observed or whatever came into my mind. Most sketches are done with Indian ink, gel pens, and gouache.

 pg 1

pg 2

pg 3

pg 4

pg 5

pg 6

pg 7

pg 8

pg 9

pg 10

pg 11

pg 12

pg 13

pg 14

pg 15

pg 16

pg 17

pg 18

pg 19

pg 20

pg 21

pg 22

pg 23

That's all for now~ Stay tune for more Landscape Narrative project I did


Thursday, August 18, 2011

The werewolf evolution

Just a weeks ago, I just finished my 2 months internship at Neowiz Studio. Neowiz is actually a big company known for making many online games, such as A.V.A, Crossfire, Dekaron, and Special Force. I worked at Neowiz studio as a monster designer for the next upcoming MMORPG again. This time I had a chance to save each images in jpeg to show you my progress of making and editing a monster. The monster I was assigned is a werewolf.

 The beginning. I first started with a dark grey blob shaped like a werewolf and started adding on lights and dark, slowly adding more and more dimensions on the blob. The left arm is missing because I still had some trouble how will the werewolf pose its hand.

Now that I got the shape of the werewolf I began to capture its anatomy. I began to anatomy and muscle structures; I left the werewolf naked just in case to wonder if the art director does not want furs all over the werewolf body. I also changed the right leg position.
Turns out the art director decided the werewolf should have its body covered with fur, so that means all the muscle detail I gave was unnecessary =( But at least the muscle structures helped me to create proper anatomy of the werewolf. Here I begin to add base color on the werewolf. I also changed the werewolf ab muscle.

I realized that the werewolf face remained unfinished and needed to be revised so I worked on it and turned out to look like a rat :O_o: Stills needed to be revised. Here I also began to add some long furs on the werewolf body: the head and private part.

The werewolf face design is finally done. I added some long fur on its arm. Here where the challenge begins: the fur around its head. When 3D modelers structures fur they don't simply add one hair at a time, it is obviously time consuming and too much pixels on one model, they need dimension. What the 3D modeler do is he/she creates a block and add texture on top of it which tricks the viewer as if the block has fur around it. Here I got stuck really bad and you can see how I attempt to make blocks of fur.

 Jae-Min Kim, monster lead designer, gave me a great tip to draw a dimensional fur. He says, (in Korean) "Instead of thinking that the werewolf has fur around its head, think that the werewolf substituted paint brush as a fur." The paintbrush has one batch of fur, easier for me to draw a batch of fur and making it easier for 3D modeler to see what fur is in one batch. It's kinda hard for me to explain in words - ___ -

Finalized design. Took me about 1~2 weeks to finish and get confirm by the Art Director

 Here's the image for those who wants to see image by image:
(*edit* Seems blogspot will resize my image, so I have to use photobucket to get original size for this image)
Photobucket